HowTos:Configure Mac OS X Printing
Install the printer to your machine
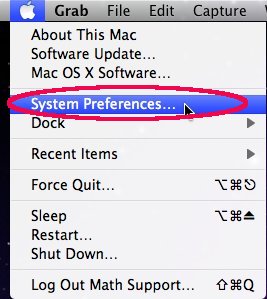
1. Begin by clicking the apple in the top left corner of your screen, and selecting "System Preferences"
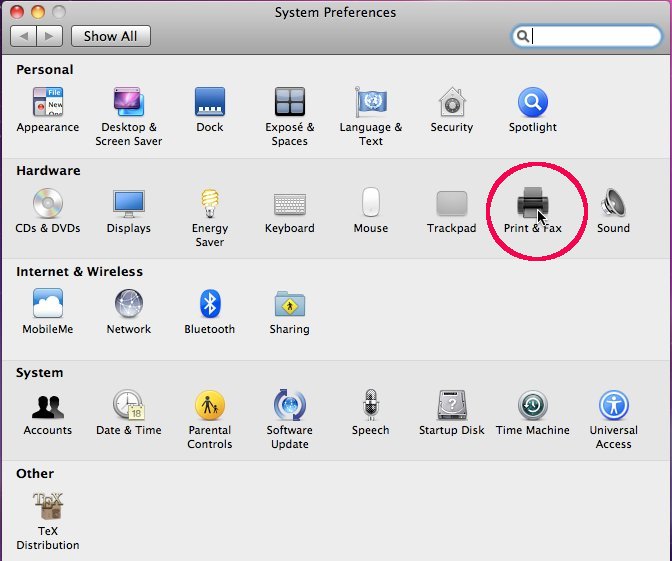
2. Open "Print and Fax"
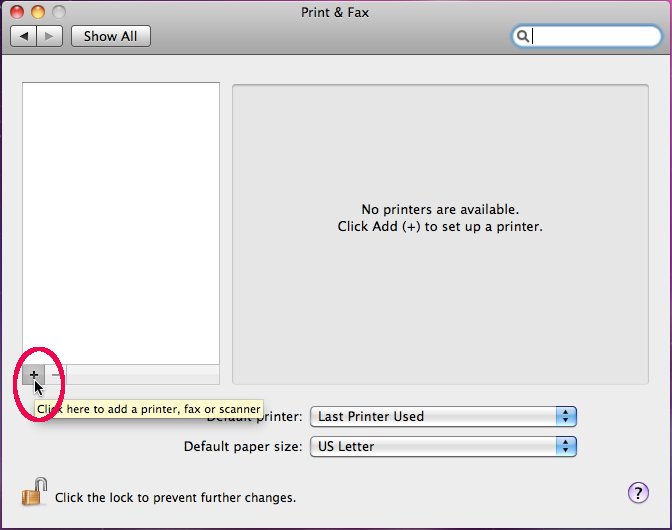
3. Click the "+" sign to add a new printer
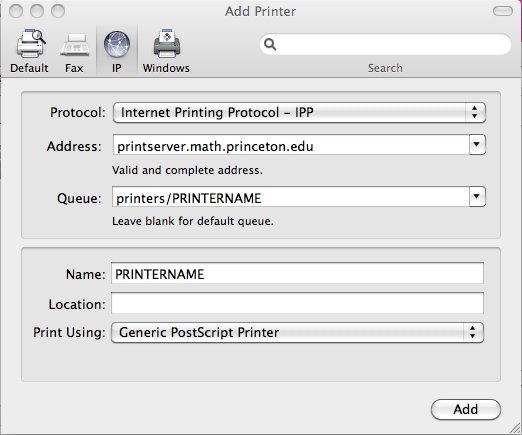
4. Fill out the form as you see in the screen shot below. Make sure you change the Protocol to "IPP" and in the queue field be sure to type "printers/PRINTERNAME" substituting PRINTERNAME for the name of the printer you are connecting to (i.e. Fine318, Fine205), then click "add". Also, give the printer a name that will help you remember where it is. (For a list of available printers please see:)
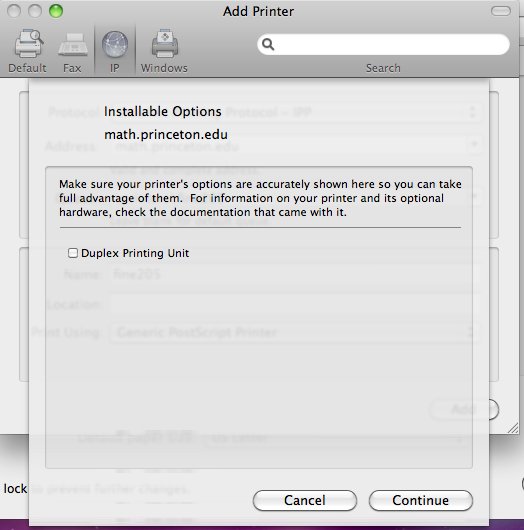
5. If the printer has a duplexer click the "Duplex Printing Unit" option. Most of the public printers in Fine Hall do have this option so if you're not sure check it any way.
If you are printing on the wireless network please continue below
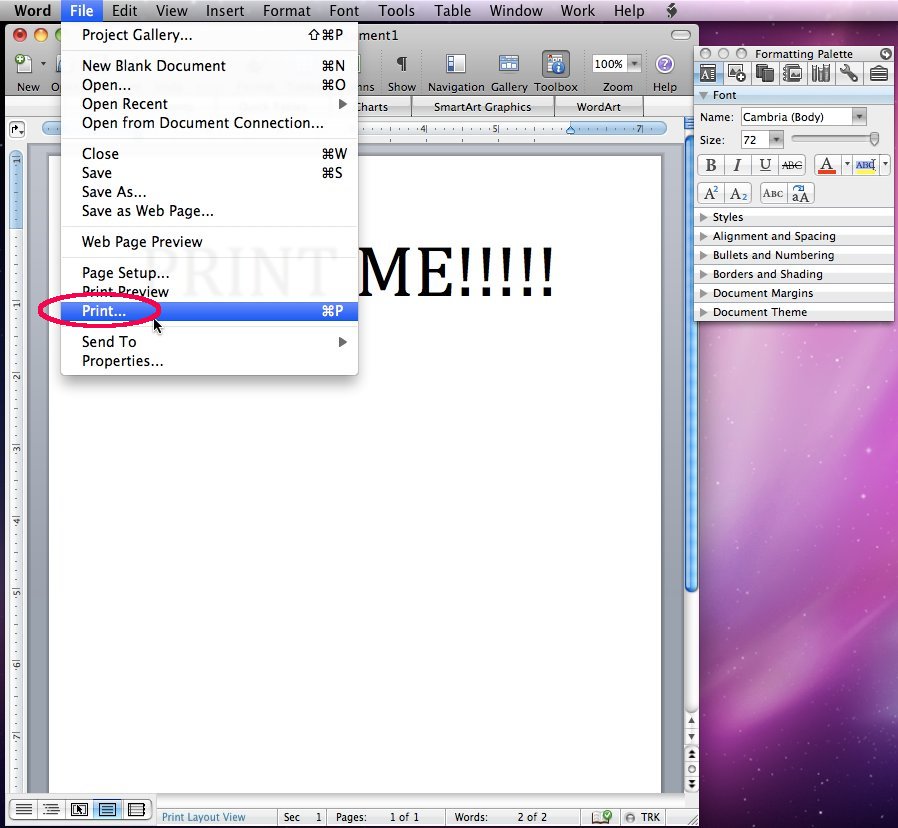
6. Authentication is required on the wireless network. Open the document you wish to print, select file and then print.
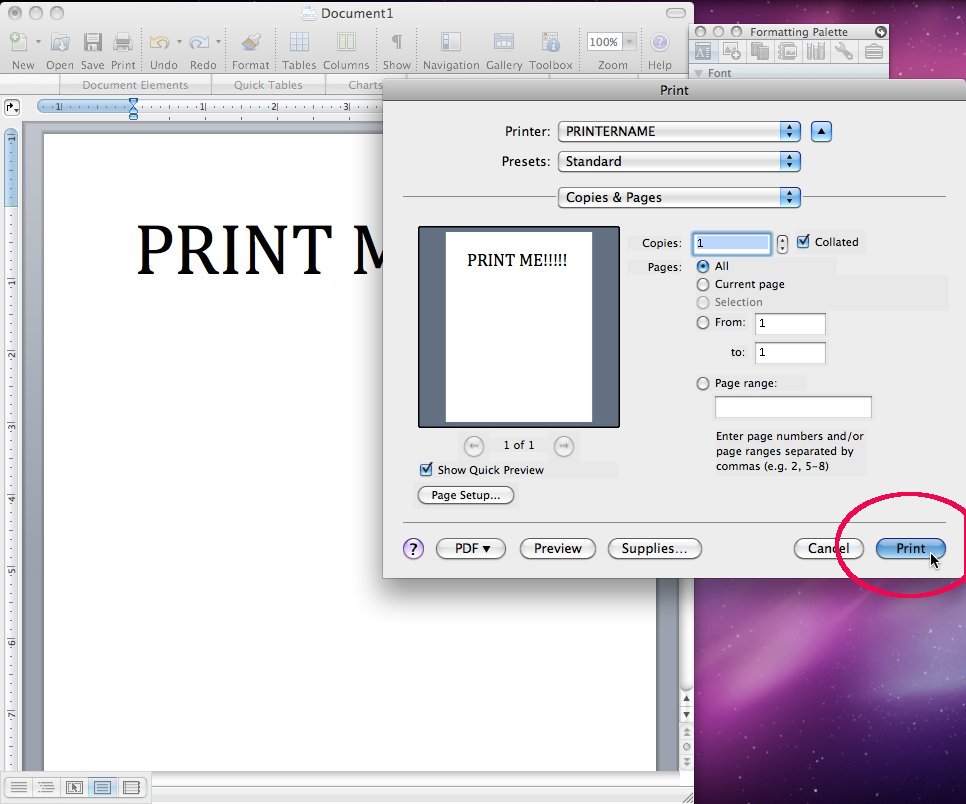
7. Make sure the printer you've installed is listed as the current printer then click the print button.
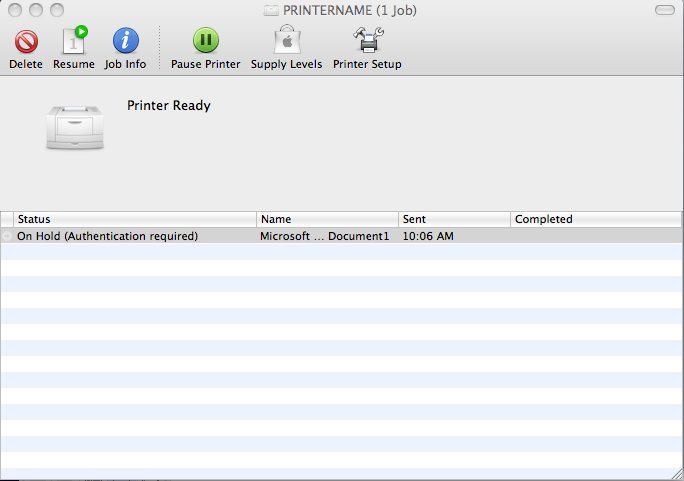
8. Click the printer icon that shows up in your dock
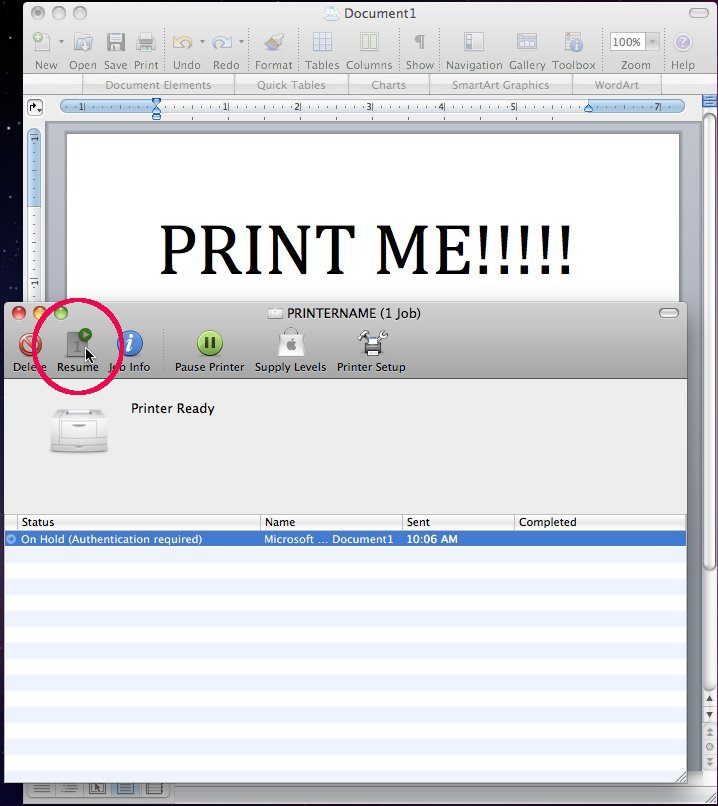
9. You will notice the job status is "On hold (Authentication required)"
10. Click the resume button
11. Enter your Princeton ID and password in the authentication window
