HowTos:Configure MacOSX for Dell W5300n
If you are trying to add 5th or 11th floor printers to your Mac OS X machine you will be asked for a precise printer type but, at least for now, you will not find Dell among the different printer manufacturers. Please follow these directions to configure your printer. This will enable you to take full advantage of various printer features, like duplexing and tray selection.
Download Dell W5300n ppd file to your desktop
First we need to download the Dell W5300n ppd file to your desktop. Either open up the following link in new window (so that you can continue following instructions on this page) or else save the file the link points to and skip to next step: Dell W5300n ppd
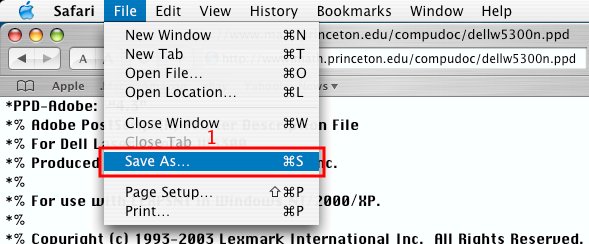
If you have opened above link with Safari then you will have to choose "Save As" from File menu
followed by choosing where to save it. We will choose the Desktop for our howto:
Safari will then offer to append the .txt extension to dellw5300n.ppd file name. Please choose to do so by clicking on "Append":
Configure printer
Now that we have the necessary printer description file (dellw5300n.ppd.txt) we will finish configuring the printer. In the below screenshots we assume you chose to use AppleTalk but you can also follow these instructions if you used SMB/Windows printing or CUPS/IPP. These instructions only really show you how to configure the printer type.
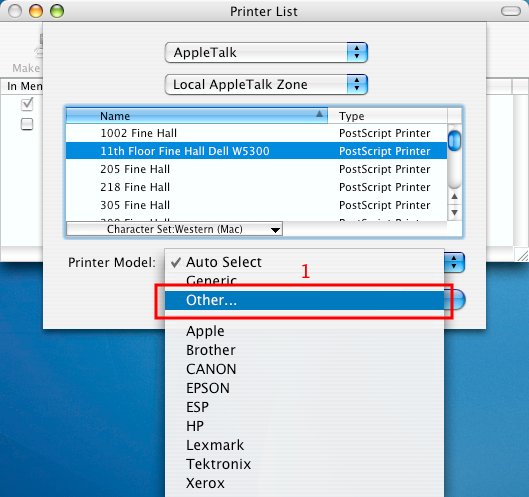
For the printer model please choose "Other":
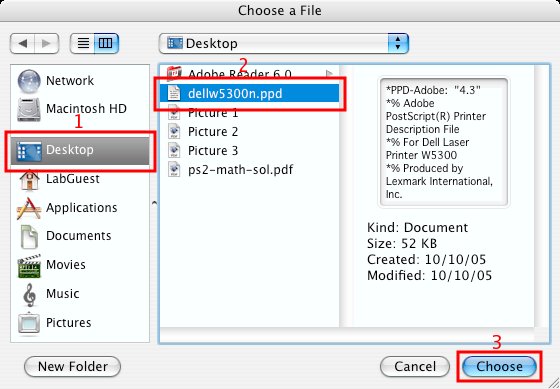
After choosing printer model "Other" you will be presented with a window allowing you to choose the printer description file (ppd). Please browse to where you saved dellw5300n.ppd.txt, in our example "Desktop" (1), select it (2) and confirm by clicking on "Choose" (3):
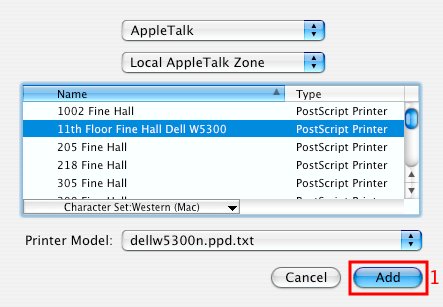
That's it - the printer model should now say "dellw5300n.ppd.txt" - just click on "Add" and that is it:


